skip to main |
skip to sidebar
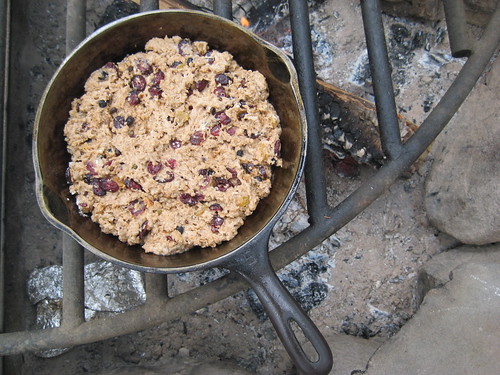
We just got back from camping - the highlight (food-wise) was definitely the bannock. I got the idea from another blog called Under the High Chair - I had never actually heard of bannock before, but liked the description (as a sort-of scone cooked over the fire), and so I started to search on the web for a good recipe. I found one that looked good (there are many, all variations on flour, baking powder, fat, liquid...) and I would give you a link, except that I didn't save it, and it didn't print out with the recipe. Sooo, I'll just copy the recipe here:
Cinnamon Bannock Delight
- 1 1/2 cups unbleached white flour
- 1 round tsp fresh baking powder
- 1/4 tsp salt
- 2 tbsp brown sugar
- 1 tbsp lard (I actually used "butter" - I mean the fake whipped butter)
- 2 rounded tbsp powdered milk
- 2 tsp cinnamon
- 1 handful raisins (I used a mix of raisins, cranberry raisins, and currants - and I'm sure I used more than one handful...
Mix all of the dry ingredients before hand and put them in a plastic bag for storage.
Make sure you bring a good cast iron pan to cook this over the fire.
At the campsite, warm about a cup of water.
The recipe said to mix the lard with the brown sugar, and add it to the rest of the ingredients (except the raisins), but I didn't do this - I had the sugar already in the dry stuff - the only problem with this is that the brown sugar started to clump up, and I had to hit the bag with a mallet to break up the clumps before I went on with the recipe - perhaps if I had added the brown sugar and "butter" together as the recipe suggested, this wouldn't have happened.... After you cut the butter (and sugar) into the dry ingredients (just use your fingers to mix it until it looks like oatmeal and seems to be thoroughly mixed), add the raisins. Then add a bit of the warm water and mix. Add a little more water, mixing thoroughly after each addition, trying not to add too much. As soon as the dough forms a ball, stop adding water - you don't want it to be too sticky. Form the stiff dough into a ball, and set the pot near the fire, where the dough will stay warm and rise. Allow 10 minutes for rising.
The recipe said that you should be cooking on embers, so you should add a few small logs at the start of the rising, and they would be ready for the pan after 10 minutes of rising - I think they must have meant if you were putting the pan directly on the embers - I put the pan on a grill over the fire, and found that embers weren't hot enough, and that a bit of a fire was needed for the right texture, and to cook it all the way through.
Remove dough from pot and place into a greased pan (I just used spray oil in my cast iron pan). Press dough into frying pan to a maximum depth of 1 inch and cook flat over moderate heat for 8 to 10 minutes a side. (I found it a bit tricky to flip it - make sure you have a good spatula, not one of those dinky plastic camping ones...) The bannock should be cooked in 16 minutes. Don't let flames touch the pan, or the bannock will burn. To check if done, tap the bannock on each side - it is done when it sounds hollow.
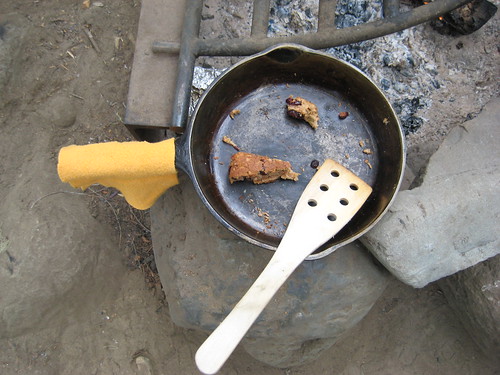
- You added too much water and dough will be wet/spongy inside. Try again adding less water.
- You did not let the dough rise for at least 10 minutes in a warm place, and bannock was wet and spongy
- You cooked it too fast (burned on outside and moist on inside) or over too low a heat (very light brown on outside and moist inside
Everything I read made this sound trickier than it was - I made the bannock twice, and the first time it wasn't quite done on the inside (but still delicious), and the second time it was perfect! I think I didn't have enough heat the first time.
Picky loved it (especially smothered with Nutella) - I can see a new camp tradition starting!
During the heat wave last week, I spent some time in the air-conditioned book store looking at all the new cookbooks. I'm an addict - there is something a bout a new cookbook that I love love love - I have plenty of them already, but I'm alway s still excited about adding a new one to my collection. Cookbooks, when they are well done, are not just a bunch of recipes: they have a personality. If a recipe was all I was after, there is not a recipe in existence that I couldn't get off of the web somewhere - you just have to know what you're looking for. A cookbook, on the other hand, invites you into some one's kitchen to experience their life and family through food. I have many different styles of cookbook in my collection, and I spend time looking through them all - some have a picture on every page showing a mouth watering dish, some are just text (but these have personality just the same - I guess it's the collection and the way it is presented). The latest addition to my collection (you didn't think I could spend the better part of a hot afternoon in the bookstore without actually buying one, did you?) has more personality than many of my other cook books put together. familymeals by Maria Helm Sinskey. What gives it so much personality? I think layout has a lot to do with it - lots of family pictures, beautiful colors, a feeling of natural, homey comfort foods. I like the voice that Maria speaks in - she obviously feels strongly about local and organic foods, but she isn't preachy about it. She also promotes family and friends in the kitchen - which is something I really believe in as well, although it doesn't happen as often as I would like (I usually end up alone in the kitchen fixing dinner, for example. I always have help for baking and other snack-making, however.) I also love the selection of foods - it is the kind of food I gr ew up on - very American (I think, I'm not really familiar with labels) and comforting - and not afraid of a little butter and cream (which is both good and bad, in my book...). I also love that she has little "Try this at home" pages that show you how to make homemade ricotta cheese (I'm definitely going to do this) and raspberry jam. Ok, that being said - I've only tried a few recipes so far, and I'm not sure what I think. I made the pint-sized peach cobblers for a BBQ last weekend - Picky and her friend helped to cut out biscuit shapes to put on the tops, but Picky wouldn't touch th
 em when they finally came around (she was too busy eating my homemade frozen yogurt - I'll share this recipe soon). I thought it was pretty good, but a little bland - but then, I've never actually had a peach cobbler before. I'm sure that these things all depend on the natural flavor of the fruit - peaches have a very mild flavor anyway, and so I'm sure a peach cobbler is supposed to be subtle. It was a bit too subtle for me - although everyone else seemed to enjoy it, and they certainly looked really cut
 e. I wonder if nectarines would have a little more of the flavor I'm looking for?The other recipe I tried was the macaroni and cheese. Everyone has a recipe for this, and you would think they wouldn't be all that different - but the little things sometimes make a very big difference. I noticed first off that this recipe called for much less macaroni that I was used to (1/2 a pound), and my initial thought was: "Great! who wants 3 days worth of macaroni and cheese? My butt will thank me!" But then I noticed that the sauce part looked about the same as recipes that call for way more macaroni - in other words, "This is gonna be saucy!" Well, ok, I was willing to give it a try anyway, I was sure that, for macaroni and cheese, saucy was good. I still felt compelled to modify the recipe, however - it called for whole milk (I used 1 %), and heavy cr eam (I skipped this), and also 2 more tablespoons of butter than I actually used. Plus I put a bread crumb/cheese topping on it that it didn't call for, because that's Picky 's favorite part. It was adorable in the little ramekins (I usually make mac and cheese in a lasagna pan, for maximum crunchy topping). Anyway, even with my subtractions (and addition) IT WAS STILL CREAMY! And super saucy. Which was good, but I couldn't help but wonder at the calories loaded into that little ramekin. Not only that, I am always surprised at how much time it takes to make macaroni and cheese. I always find myself whisking the milk and flour for much longer than I want to. Maybe we get spoiled with instant mac and cheese, and we start to think of it as a "quick food", and so when we really make it from scratch, it takes more effort than we've anticipated. Or maybe not "we", maybe just "me". I don't know. Anyway, although it wa s delicious, I'm wondering if I couldn't really simplify the whole macaroni and cheese thing, although not to the point of instant. What if I take the cheese custard recipe, and add some cooked macaroni? I think I'm going to have to try this - because making a cheese custard is a snap, that takes 5 minutes to assemble.But don't think I've given up on my new cookbook! I'm still looking forward to making my own ricotta, smoking salmon, and trying a few recipes that Picky chose to see if she'll really eat them, like crispy shrimp with real lemony mayo, and ham, tomato, and cheese panini. I'll let you know how it goes.
 Well, it has definitely been too hot to cook around here! We've been camping out in our basement, eating picnic food on a towel spread out on the blow-up mattress that we've also been sleeping on. It's times like this I'm glad I finally broke down and bought an ice-cream maker this year! I wanted to make my own frozen yogurts (with my own home-made yogurt) that are lower in sugar and have fewer ingredients than store-bought. Of course, you don't really need an
  ice-cream maker to make your own frozen yogurt or ice-cream - but it does simplify things, and makes a nice creamy blend (in much less time). If you want something firm enough for cones, however, you have to take the dessert out of your maker and put it into a container and the freezer for a bit, to firm it up. It comes out of the maker looking more like soft-serve - perfect in a bowl with a little granola sprinkled on top!
This recipe is great - and you could easily  use it for smoothies or smoothie pops as well, although it makes a larger amount than I would normally make for that - perhaps for a brunch or a preschool snack. I got this from Kids' fun & healthy cookbook by Nicola Graimes:
- 2 medium ripe mangoes (I used about 2 cups of frozen cubed mango)
- 2 medium bananas
- 2 cups yogurt (thick works best, but it doesn't have to be Greek style)
- 3 Tbsp powdered sugar
- squeeze of lemon
Cut the bananas and mangoes into chunks and mix with the other ingredients. Yo u could blend it together in a blender, or use an imersion blender, until it is a thick and creamy mixture (if you have a child like mine, you may want to be sure there are no chunks...). If you have an ice-cream maker, you can proceed according to the directions on your machine: I poured the mixture into the spout and watched until it looked like soft-serve (5-10 minutes), and then I transferred it into a container and put it in the freezer to firm up - although that didn't last long, and we ended up scooping the semi-soft mixture into our ice cream cones anyway. If you don't have an ice cream machine, put the mixture in a shallow container with a lid and freeze it. After 2-3 hours, whisk the mixture with a fork and put it back in the freezer for another 3 hours and mix it again. Yummy!
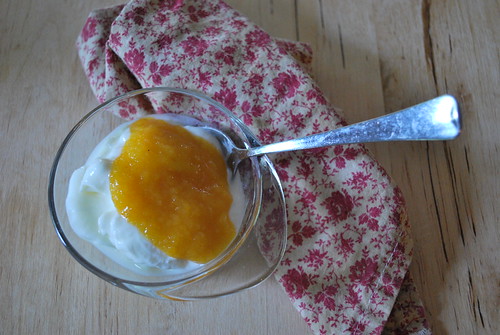
Well, we had another food success last night - Picky tried and loved the turkey bolognese with spaghetti that I made! This is one of daddy's favorite dishes, and I make it mostly for him, as Picky hasn't tried it up to this point - I was thrilled to see her enjoy it! I will post a recipe as soon as I figure out exactly what I put in it - I'm thinking of adding in some kidney beans and see how that goes over as well. Anyway, I'm glad that I have the memory of Picky slurping up pasta last night (she usually only eats Asian style noodles, very rarely the Italian kind...) because this morning she was back to her usual antics. Picky wanted some iced tea with breakfast, which is fine. She wanted sugar, and so I got out a little container with simple syrup in it, which is a sugar and water mixture that we use to sweeten iced drinks, so that they won't be grainy. I explained this to her as I scooped a bit into her cup. Somehow she decided that the simple syrup made her tea "taste funny", and she wanted "regular sugar". Taste funny? It's the same thing!! It's even made from the same sugar!! Of course, explaining this does no good, so I let her put "regular sugar" into her cup instead. After all this tea business, she decided she was now no longer hungry for the cheese omelet that I made...sigh. Well, maybe it's the heat - it is quite hot already today, and promising to be sweltering. It's so hard to eat, or cook, in this heat. So here's an idea for something that requires little heat to make and is soothing and cool to eat - apricot puree swirled into yogurt!
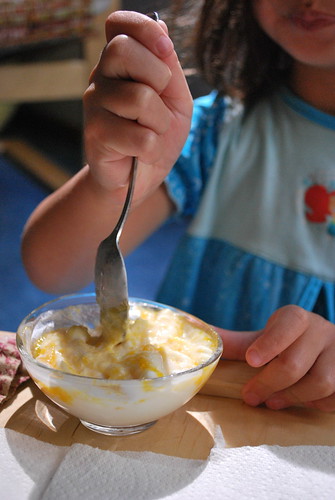
I like to make my own yogurt - I have a large maker from yogourmet, and we go through the yogurt within a week or two. Home-made yogurt is, like most things home-made, better than store bought. For one thing, you can control the tang and the consistency. I like tangy yogurt, but Picky likes it a bit sweeter, so I usually make it somewhere in between. I also like quite thick yogurt, so I add a bit of nonfat milk powder into the milk when I make it, and that thickens it up a bit. All of this yogurt doesn't mean that I never buy those little tubes of pre-sweetened yogurt for Picky - although I have managed to convince her so far that these are a treat! I found this apricot yogurt swirl recipe in Kids' Fun & Healthy Cookbook, and since Picky has been on a bit of an apricot kick, I decided to give it a try. Ok, I admit, she tried but then ultimately rejected it based on texture (it wasn't smooth enough). I, however, thought it was lovely, and so I have it here anyway - I have a feeling that Picky will come around eventually:
3/4 cup chopped dried apricots (I prefer Turkish)
1 cup water
3 Tbsp fresh apple juice
Put the apricots and water in a saucepan. Bring to a boil and reduce the heat to low. Cover, and cook for 15-20 minutes, until soft. Let the apricots cool for about 30 minutes, then stir in the apple juice. Blend the mixture in a blender or in the pan with an immersion blender (my preferred method). Now you can put this in the fridge, and it's ready to stir into yogurt - I also enjoy a little sprinkling of granola on top (home-made, of course - I'll post the recipe eventually...)
This program on picky eating is interesting, linking picky eating with genetics. I already know where Picky got her super taste buds - I never could get used to the bitter taste of Kale or some other greens. I do like broccoli, as long as it's young and not too bitter. It does not explain, however, why picky will not eat most fruit unless it is pureed (same goes for most vegetables). And spinach is probably her favorite and most eaten vegetable (but only in something and with feta cheese - I know she got that combo from me...). Anyway, I think with Picky it is a combination of things - she is super sensitive to stimuli in general (like smells and texture), and she is also very slow to try new things (everything, not just food). I think we're doing ok with her diet at this point, just adding new foods on very slowly, and getting her involved in cooking, etc - this video is worth watching just to take a little pressure off of yourself (so that you can ignore the incredulous looks on other parents of non-picky eaters when they hear cries of disgust coming from your child at the potluck...). ;)
 Picky has finally discovered dried apricots! I've been trying to get her to taste one for awhile, but it finally took eating a cookie with daddy that had pureed dried apricots for her to decide that she liked them. (go figures it was a cookie - oh well!) And I was surprised when she then decided she could eat them plain! Of course, this gives me reason to make this apricot bar recipe (which I love). I've made it before, and she's tried it before, but she's never shown much interest. Now, all of a sudden, she loves them! Not only that, but she's decided to also love dried cranberries (which are in there too), and she's been eating them plain as well!! Well, I feel like I won the lottery - that's two fruits just in the last week! I know fresh fruit would be better, but dried is still pretty darn good for you, as long as you brush your teeth regularly...
These bars travel really well - I made them last week to take camping with us, and they were all gone by the end of the first day - they are that good! I modified this recipe from a cookbook that I found in Canada called Whining & Dining by Emma Waverman and Eshun Mott:
- 1 cup chopped dried apricots
- 1/4 cup water
- 2 tbsp sugar (optional)
- 1 cup packed dark brown sugar
- 2 large eggs
- 1/2 cup canola oil
- 1 tsp vanilla
- 1 1/2 cups oatmeal (not instant or quick-cooking)
- 1 cup whole wheat pastry flour (all-purpose would work fine too)
- 1/2 cup toasted wheat germ
- 1/2 tsp baking powder
- 1/2 tsp cinnamon
- 1/2 tsp salt

- 1/2 cup dried cranberries
- 1/2 cup chocolate chips
Place apricots, water and sugar in a small saucepan; bring to a boil.
Reduce heat to medium and simmer until the water has been absorbed. (5-10 min) Set aside to cool. (if the apricots are really hard and/or tart, put in 3/4 cups water and simmer for 20 min - then drain)
Preheat oven to 350 degrees

Line the base of an 8-inch square baking pan with parchment paper, and spray lightly with spray oil. (I don't think I actually have a pan this size, so I've improvised in several different sized pans - I think the one I used here is 9 by 9, which seems to work fine...)
Combine brown sugar, eggs, canola oil and vanilla in a large bowl. Mix in oatmeal. Set aside.
Combine flour, wheat germ, baking powder, cinnamon and salt in a small bowl; stir with a fork to blend. Add to oatmeal mixture, stirring to combine. Stir in reserved apricots, dried cranberries, and chocolate chips.
Spread mixture in prepared pan. Bake for 35 minutes or until lightly browned. Cool completely before cutting into squares. (really wait until it's all-the-way cool - I can never seem to do this, and they tend to fall apart really easily...)

Makes 16 2-inch bars.
On a different note - Picky told me today that she hopes her children will love to cook with her! How sweet is that! I told her that if she loved to cook, and shared that with them, they would love it too! :)
Tip: I've offered dried cranberries to Picky on numerous occasions, but it took buying a different brand for her to really enjoy them! I guess the ones I was getting at Trader Joe's were a little too chewy for her - I bought Ocean Spray "craisens" at Costco, and she loves them - they are much softer, and are even a brighter color. I try to stay away from the major brands when I can, and I try to buy organic as well, but if she prefers the softer ones, then that's what I will get!
The Wheat Germ I use is called "Mother's toasted wheat germ", and it's found in health food stores, and probably in regular grocery stores as well with the hot cereals. The apricots I prefer are the Turkish ones (the California ones are much chewier and have a tarter flavor); I buy mine at Trader Joe's.
This has been one of Picky's favorite meals for a long time - I made it last night and took pictures, and perhaps because I made it into a big deal, she wouldn't t ouch it! She ate toast with butter instead, which is the only thing I will make for her if she doesn't want anything on the table. Anyway, savory custards are perfect for kids - they are mild and creamy, and much less fussy to make than quiche. I can whip this up pretty quickly, but you have to give it a good 10 minutes to cool after, which doesn't make it a great breakfast - I usually serve it for lunch or dinner. If you are serving it for dinner (like I did last night), serve it with a nice big salad (for the adults, unless your child will eat salad - mine won't), it makes a nice light meal. My family is rather small (Picky is an only child), so the portion here is perfect for us, but it might be a bit small for a larger family. I tried out my new 1 cup ramekins for this one, and it made two of those, plus one small (1/2 cup) ra
 mekin for Picky. I usually use five small ramekins, and the adults just eat one or two (dh usually eats two or three). The recipe specifies four 1 cup ramekins - it doesn't really matter what size you use, but it does affect the timing a bit. I like my custards a bit firm, so I cook it longer than the original recipe specifies. This recipe is adapted from one in Vegetarian Cooking for Everyone by Deborah Madison (one of my favorite vegetarian books...). I've simplified it a bit here:
- 3 eggs
- 1 1/2 cups milk
- 3/4 tsp salt (optional pepper to taste)
- 3/4 cup shredded cheddar cheese (I use a nice sharp cheddar, you could go mild if your child prefers it)
- paprika for the tops
Preheat oven to 350. Spray four 1 cup ramekins with spray canola oil.  Arrange the ramekins in a larger baking pan without touching the sides.(like a lasagna pan) Beat the eggs and milk with the salt in a bowl or 4 cup measure. Stir in the cheese. Using a 1/4 measuring cup, scoop the mixture into the ramekins, trying to distribute the cheese evenly. Sprinkle each one with plenty of paprika. Pour hot water into the baking pan, until it comes half way up the ramekins. Carefully place them in the oven, and bake until golden on top and set, between 20-30 minutes, depending on the size of the ramekins. (give them a wiggle - they should be somewhat firm, an
 d they tend to puff up a bit). Take them out of the water bath with tongs to cool - be sure to let them cool at least 10 minutes (possibly a bit longer) before serving it to your little one - can be served room temp, just like quiche.


 Posts
Posts